 Repair Tools
 Glass Refurbishment
 Chips & Components
 Accessories
 Apple
Apple
 Mac
Mac
 Samsung
 Brands
 REPART
 Other Parts
No relevant results
Destroyed iPhone 13 Pro Restoration
Jun 11, 2022
7.3 k
0
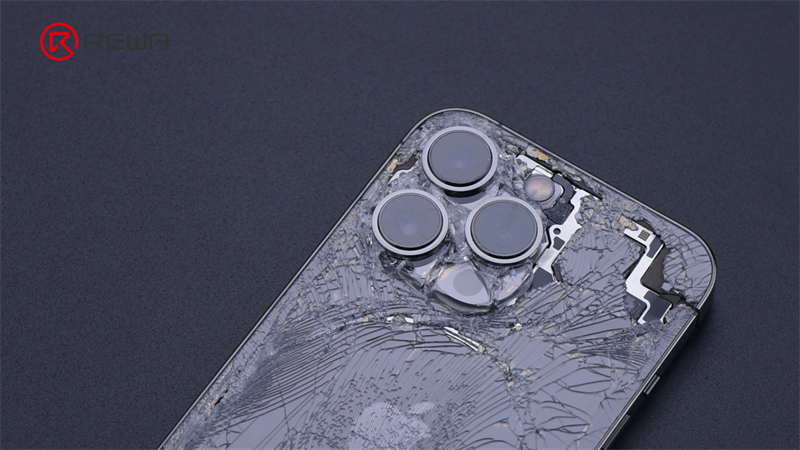
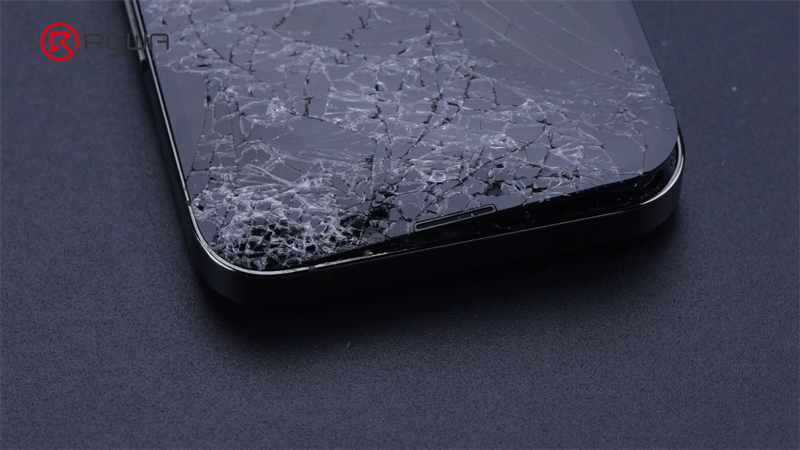
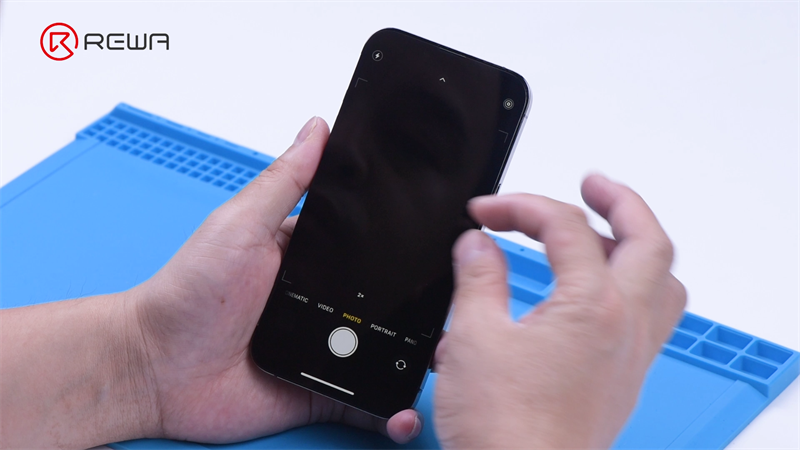
In this video, we will restore a heavily destroyed iPhone 13 Pro. This iPhone 13 Pro’s screen and back cover are severely damaged.
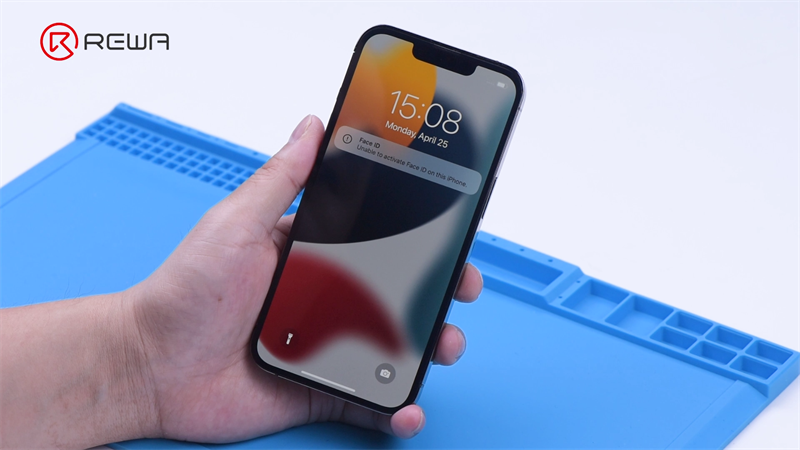
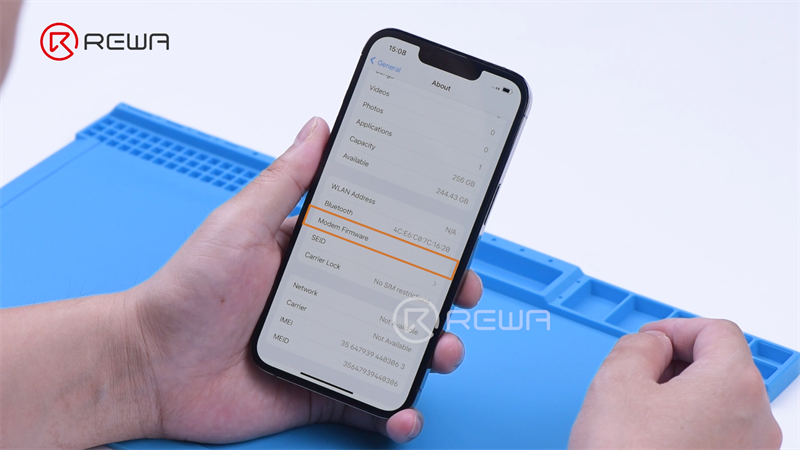
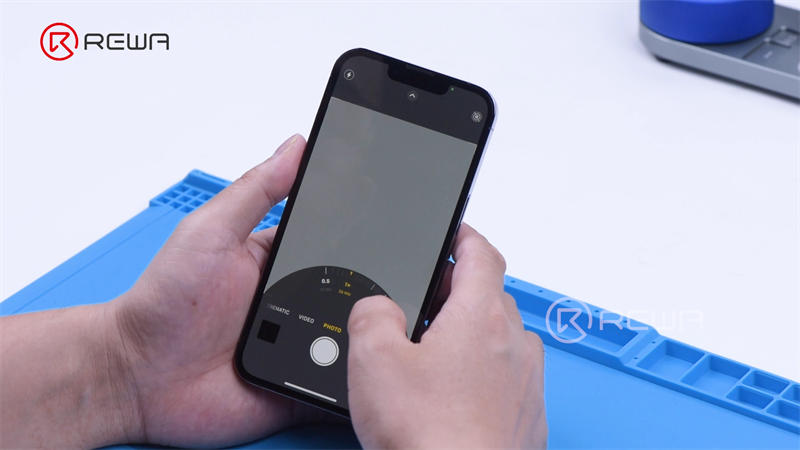
Next, we install a known-good display to test the phone. The phone can be turned on. Face ID is unable to activate. There is no modem firmware.
Both the front and back cameras are not working.
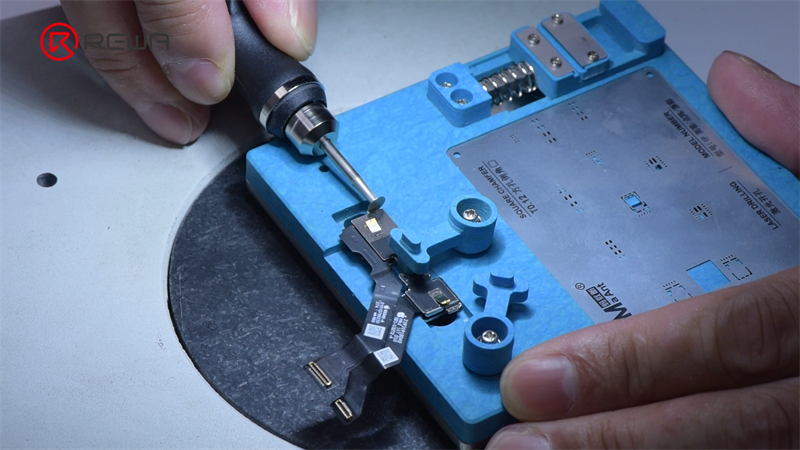
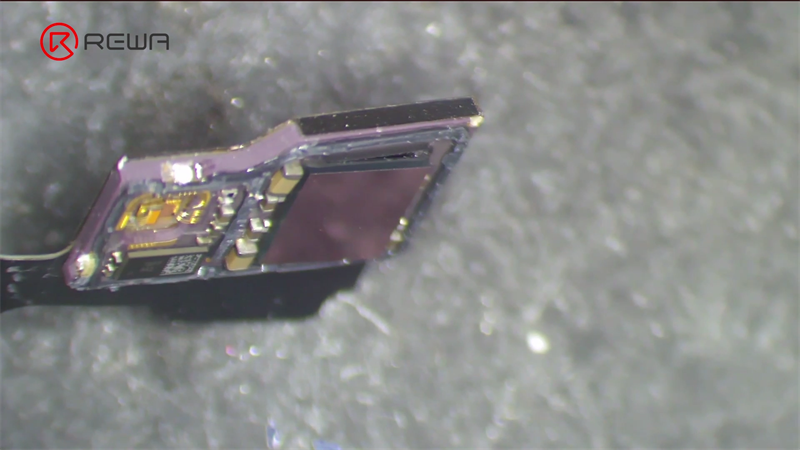
In the first place, we replace the front and back cameras. Apply protection tape on the TrueDepth camera assembly.
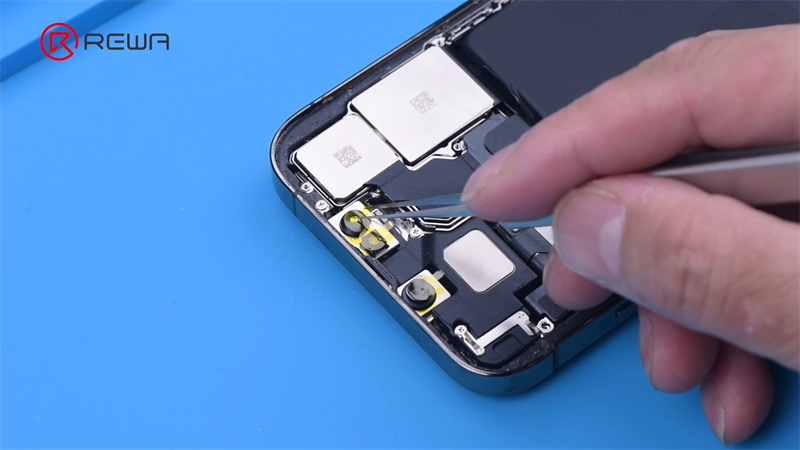
After replacement, the back camera works again but only with 2x zoom. The front camera returns to function well. The malfunctioning modem firmware and cameras are caused by the motherboard middle layers
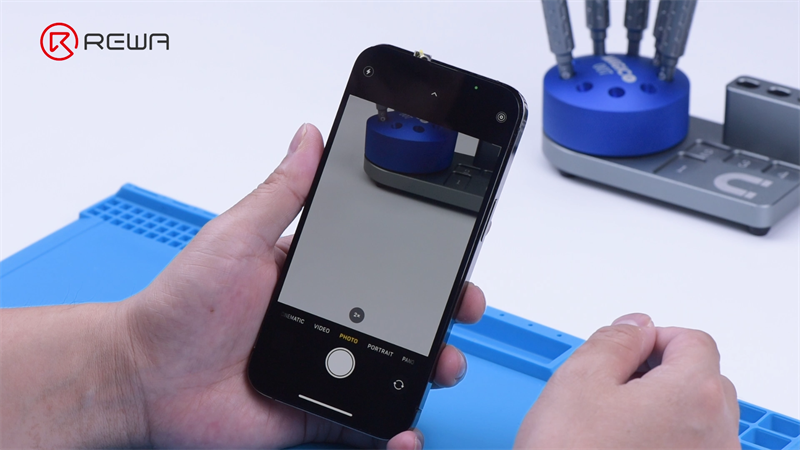
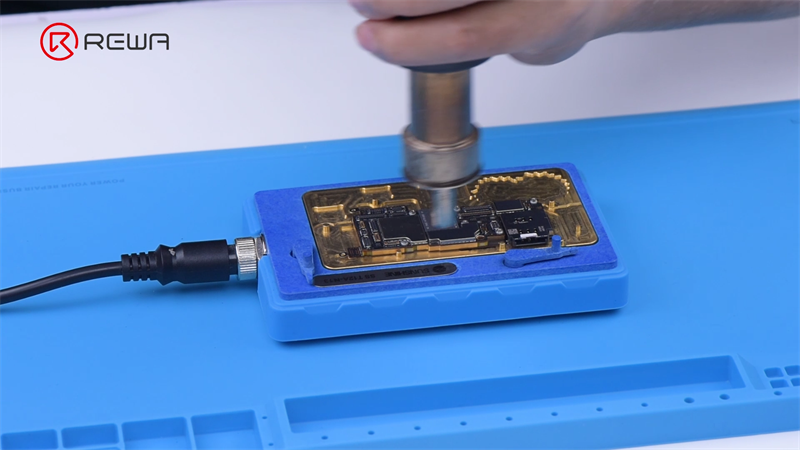
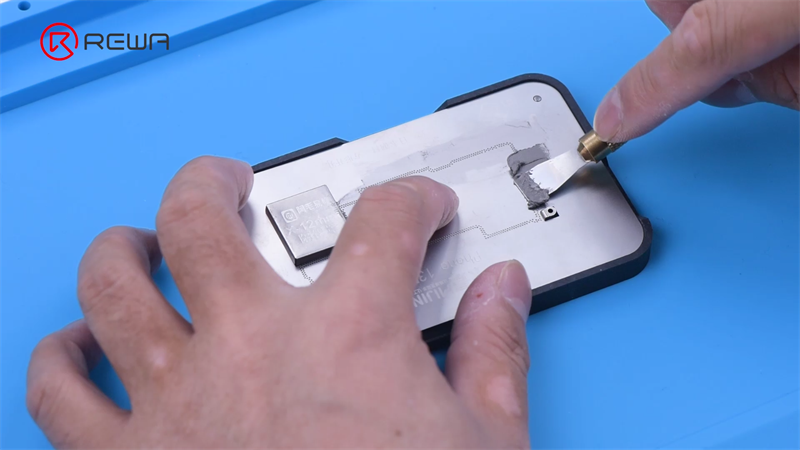
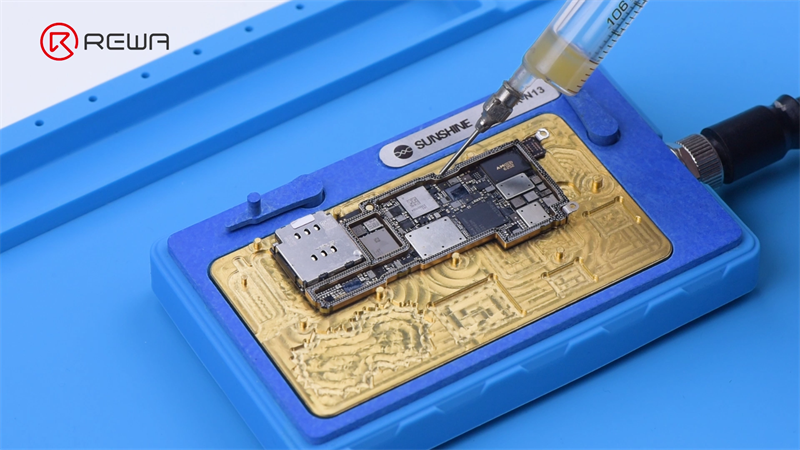
The next step is to remove the motherboard. The motherboard looks complete and not damaged. Attach the motherboard to the holder. As always, remove foam and dissipation tape.
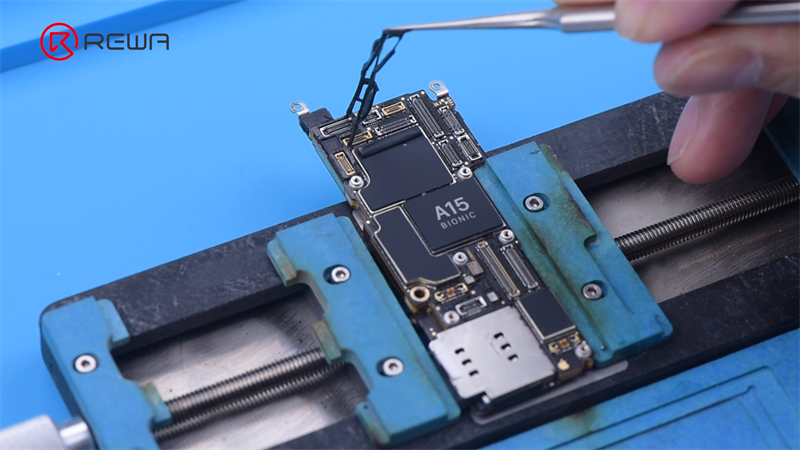
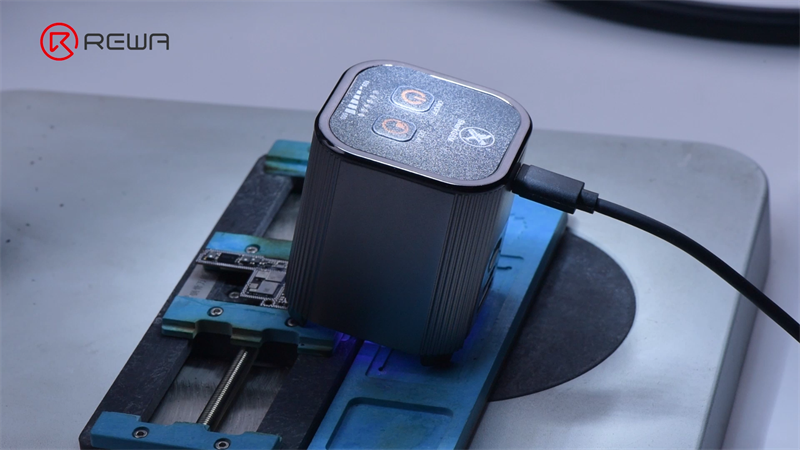
Heat the motherboard at 170 °C. Add heat with a hot air gun at 330 °C. Remove the logic board.
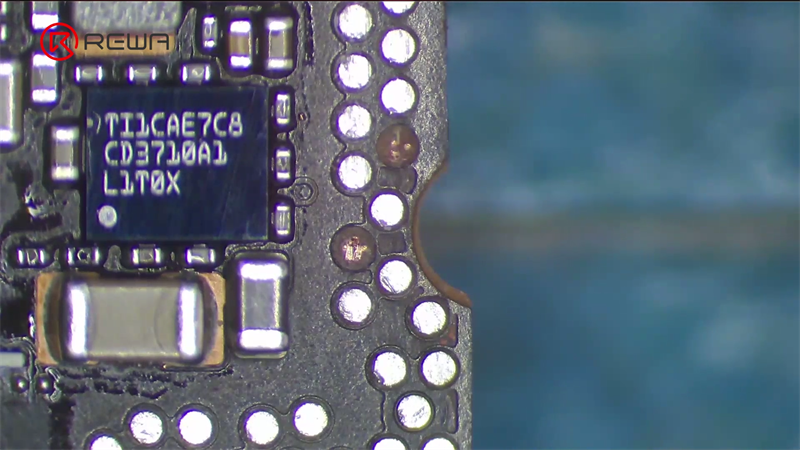
It can be seen that there are many missing pads. Then clean the bonding pads with soldering iron at 370 °C and solder wick.
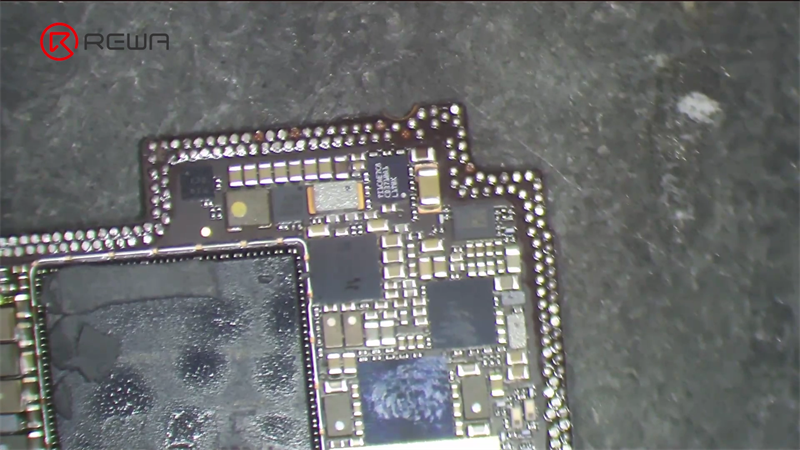
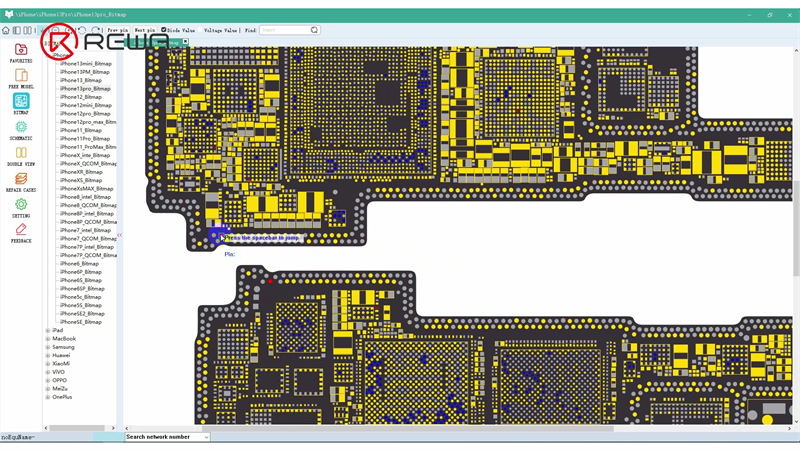
Open the bitmap to view the missing pads. There is only one missing pad that needs to be repaired.
Then we scrape to show the circuits under the pads. Clean the bonding pads with PCB cleaner.
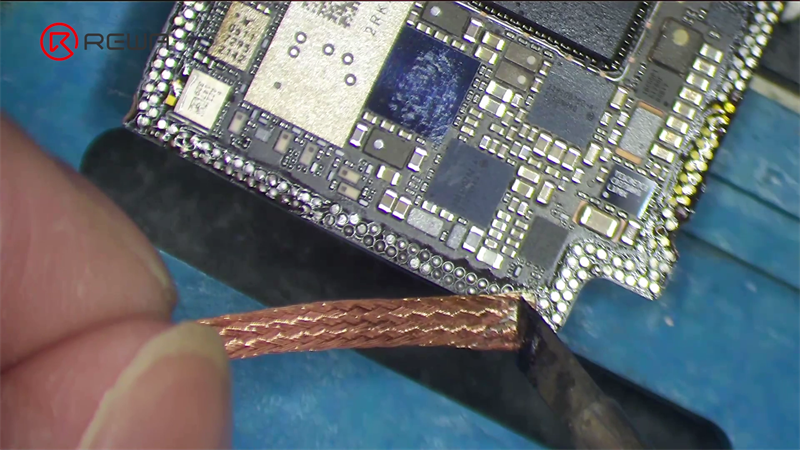
Apply some middle-temperature solder paste. Solder with a hot air gun. Apply some paste flux. Put the soldering lugs in position. Solder with hot air gun again. After soldering, clean the bonding pads with PCB cleaner.
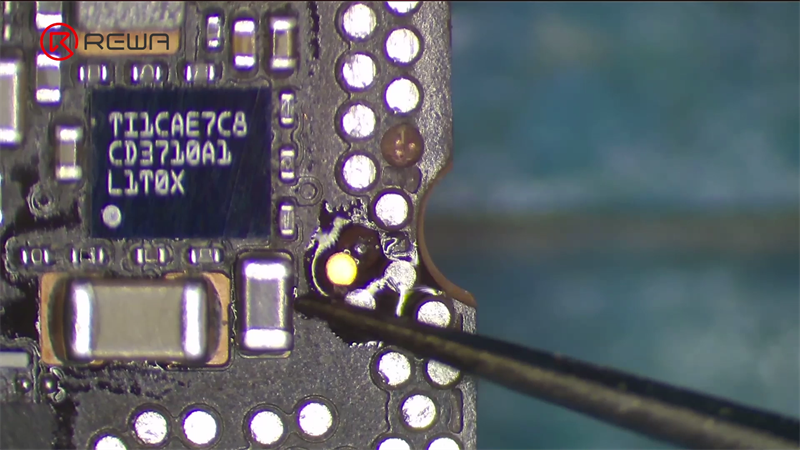
Apply some solder mask. Solidify with a UV lamp for about 1 minute. Scrape away residue solder mask to show the pads.
Then we need to recombine the motherboard. Apply some low-temperature solder paste to the bonding pads.
Put the signal board on the 170 °C heating platform to heat. After the solder balls are formed, apply some paste flux. Align the logic board. Keep heating the motherboard.
Install the motherboard for testing once it cools. Face ID is still not working. The modem firmware is restored. The rear camera works fine.
Then we inspect the TrueDepth camera assembly. Grind the metal plate. Remove the dot projector module. The CMOS of the infrared camera is damaged, which is unrepairable at the moment.
Next, we replace a brand-new back cover. Move flex cables and parts on the original back cover to the new cover. Apply new waterproof adhesive. Connect the display and turn on the phone. Everything else on the phone also works fine. That's as far as today's restoration goes.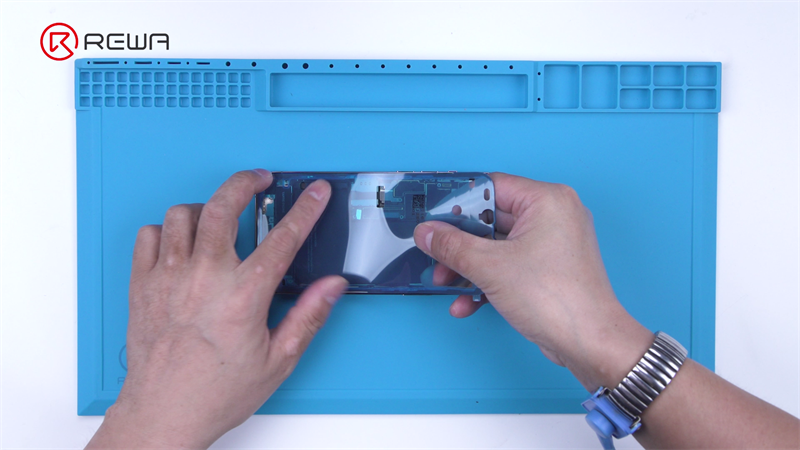
iPhone restorationiPhone 13 prorebuild broken iphonerestore destroyed iphone
Related Products
REFOX Bitmap Schematic for Motherboard Repair (Apple iPhone/Mac & Android Phones)
Sign In To See PriceComment
CATEGORIES
FEATURED POSTS
WHAT'S HOT
Face ID Not WorkingREWA-SelectedFace IDboardview softwareiPhone batteryiPhone Partsclamp fixturemobile phone repair shop nameFace ID RepairREWA Repair
Write a comment